100 Inch Elio's , either the E205 or the STD(s3021), as well as the

Elio X, 120 inch Wing Version,

with the S3021 Profile

Kits will be made to Order Only, down payment required
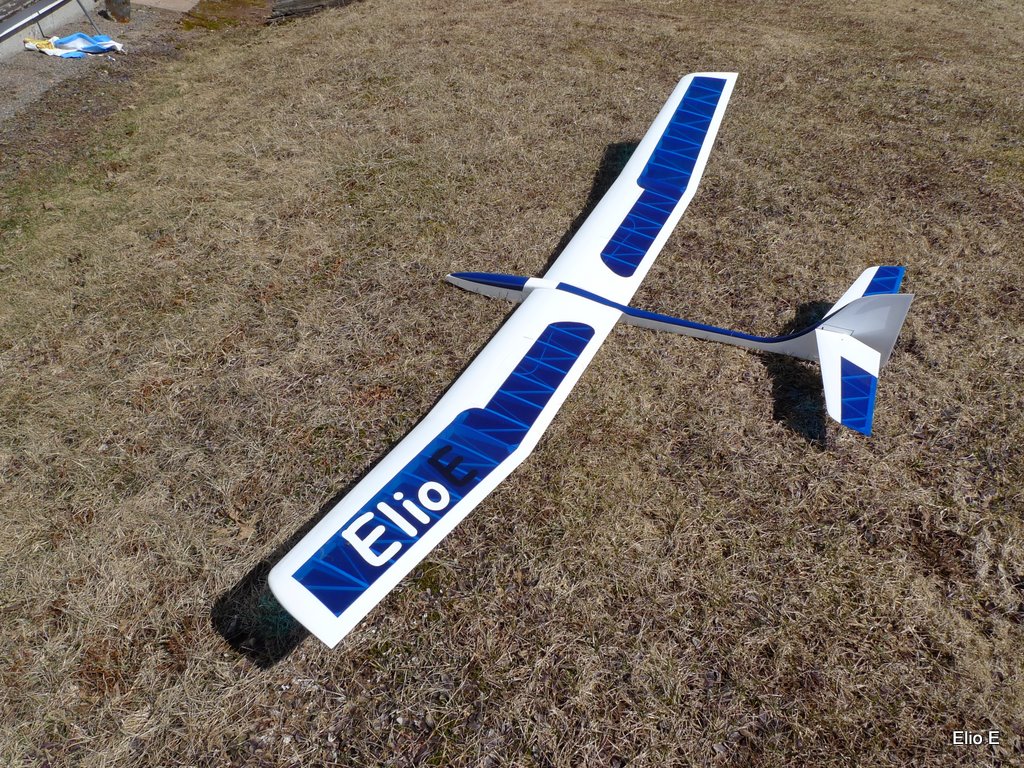
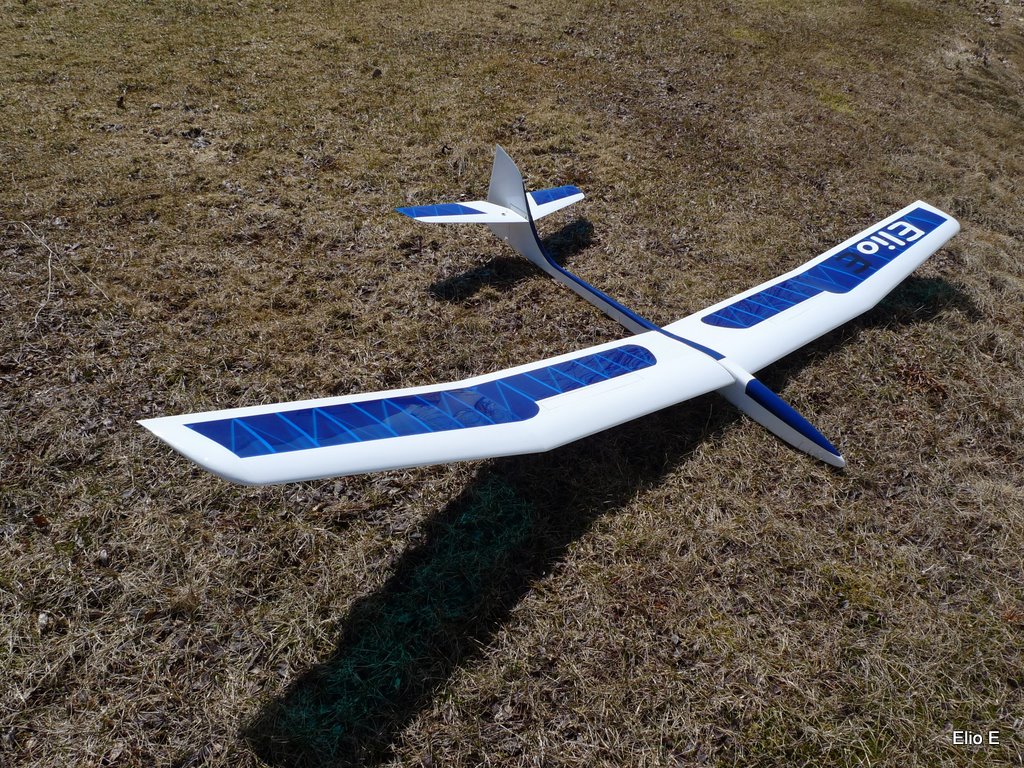
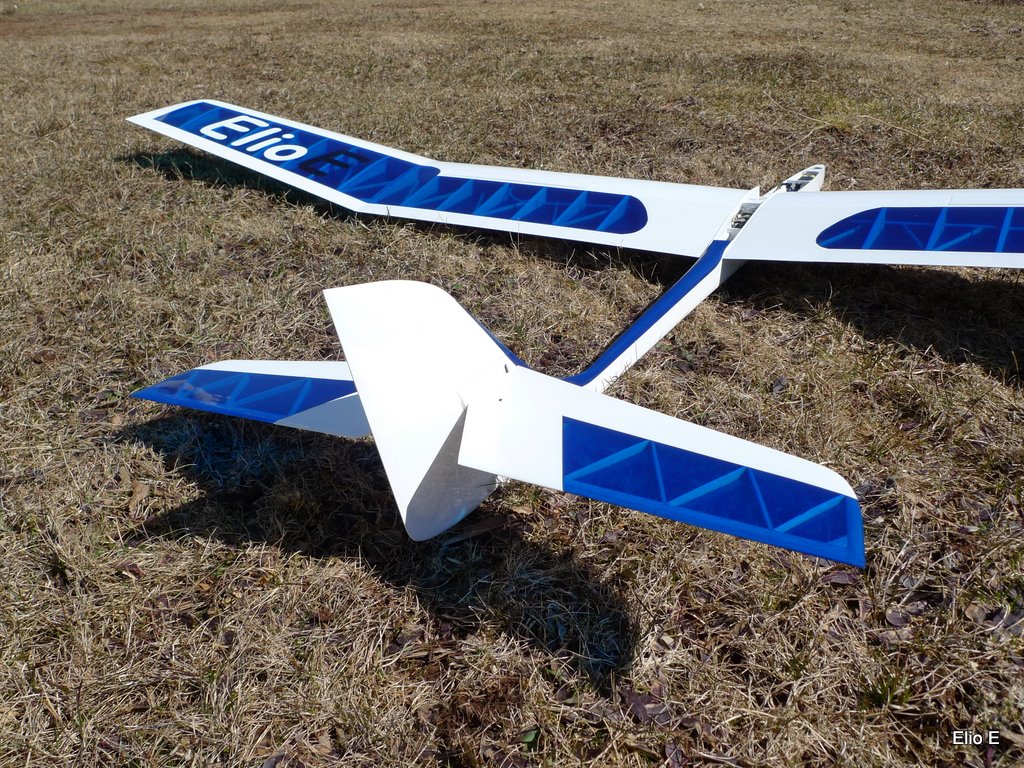
-----------------------------------------------------------------------------------------------------------------------------------------------------------------
Elio E

Younger sister to the Elio S3021

-E205 airfoil

standard balsa canopy

5/16 steel wing rod

can be lightened  with a CF Rod


The Standard Elio has a S3021 Airfoil
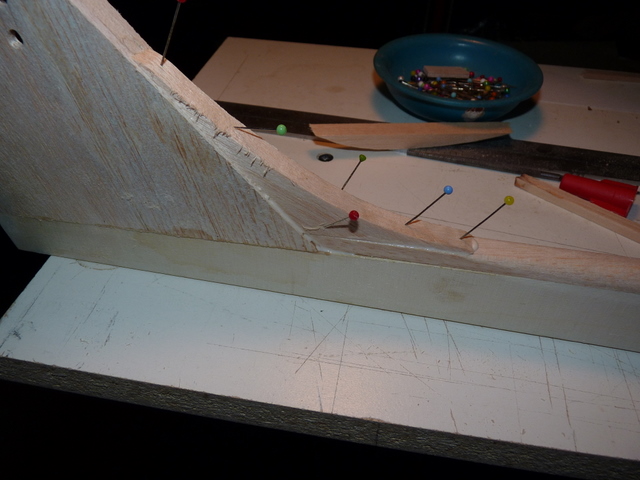
full flying stab

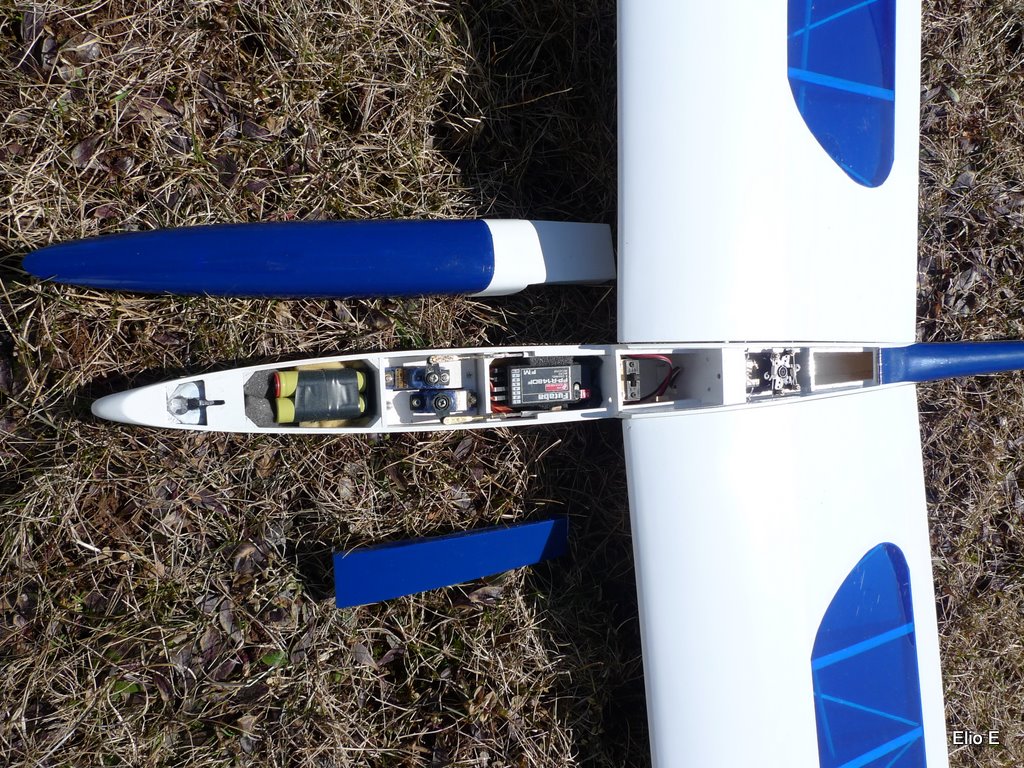
Mar 22 2012  Finished Covering and configuring Spoilers ,
Hand toss as well, required lead in area front of battery, as well as some under
battery to
balance, app, 3/8" behind center of wing rod

AUW was 1415 grams ,  50 ounces

Like to build one of these, or possibly the Elio E also 100 inch Wings

Ask about the Elio X, more info with a Goggle search for it.

or

foresthaveninn.com/wordpress   (maybe be Password Protected, Contact for PW :)  )

Here are Links to a Couple Videos

Copy and Paste

Handtoss Video Elio X   Fall 2016             https://goo.gl/photos/Fi6j8PGBYRmFZAyD8

Handtoss Video Elio X April 2017                       https://photos.app.goo.gl/2ErXxpJmLufH84js1

Handtoss (first toss) Oranje Elio                          https://goo.gl/photos/gUrSMMnF7Tc4xdHBA    


Jan 2020

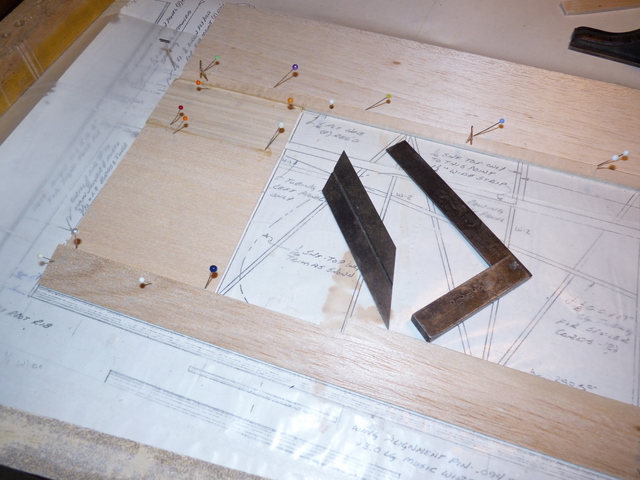
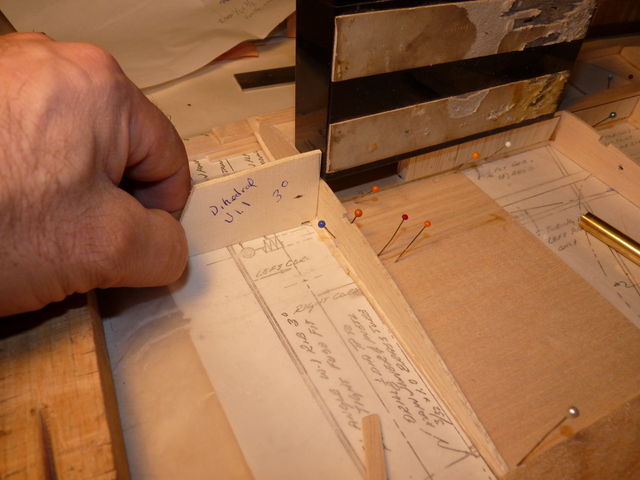
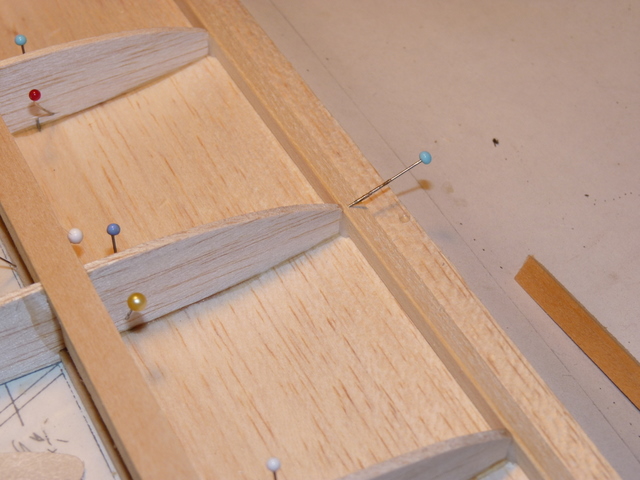
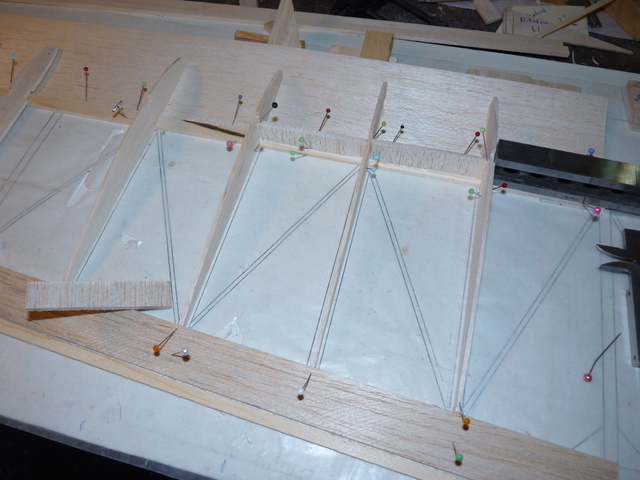
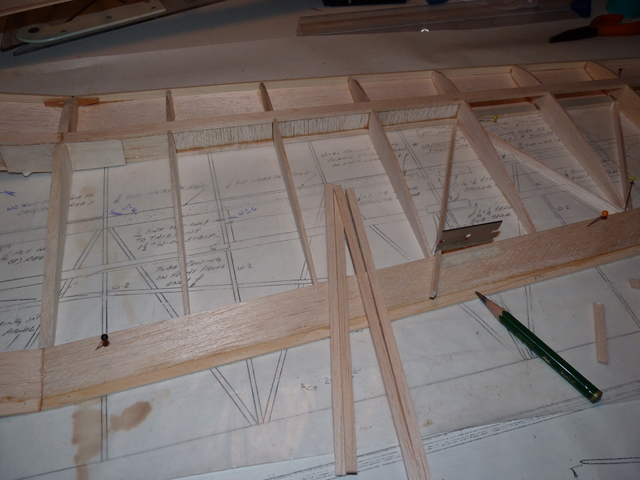
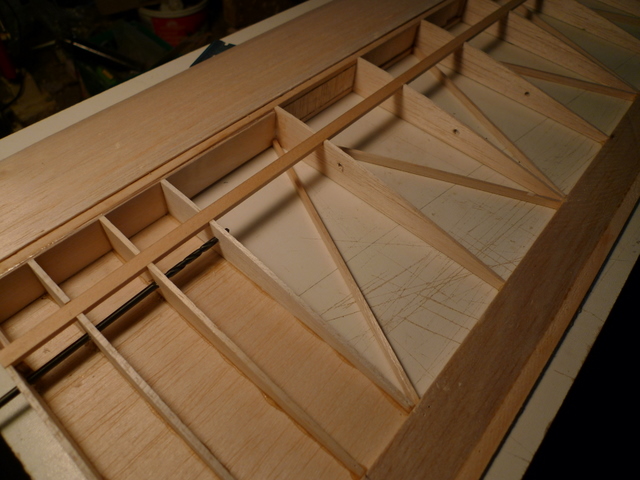
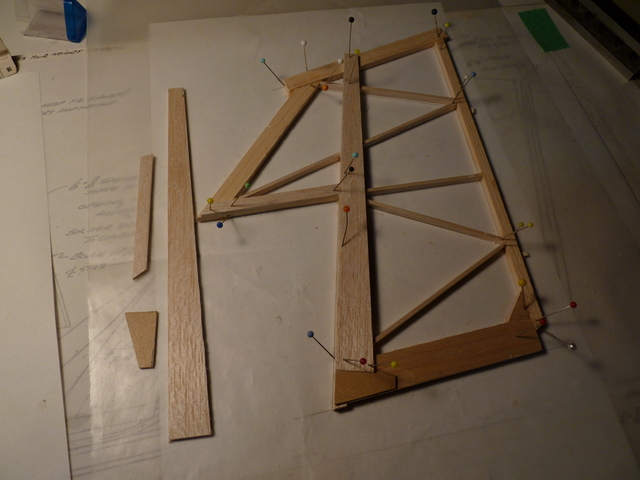
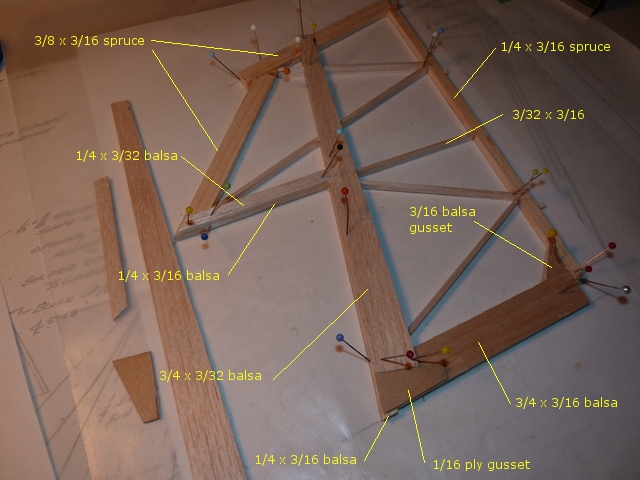
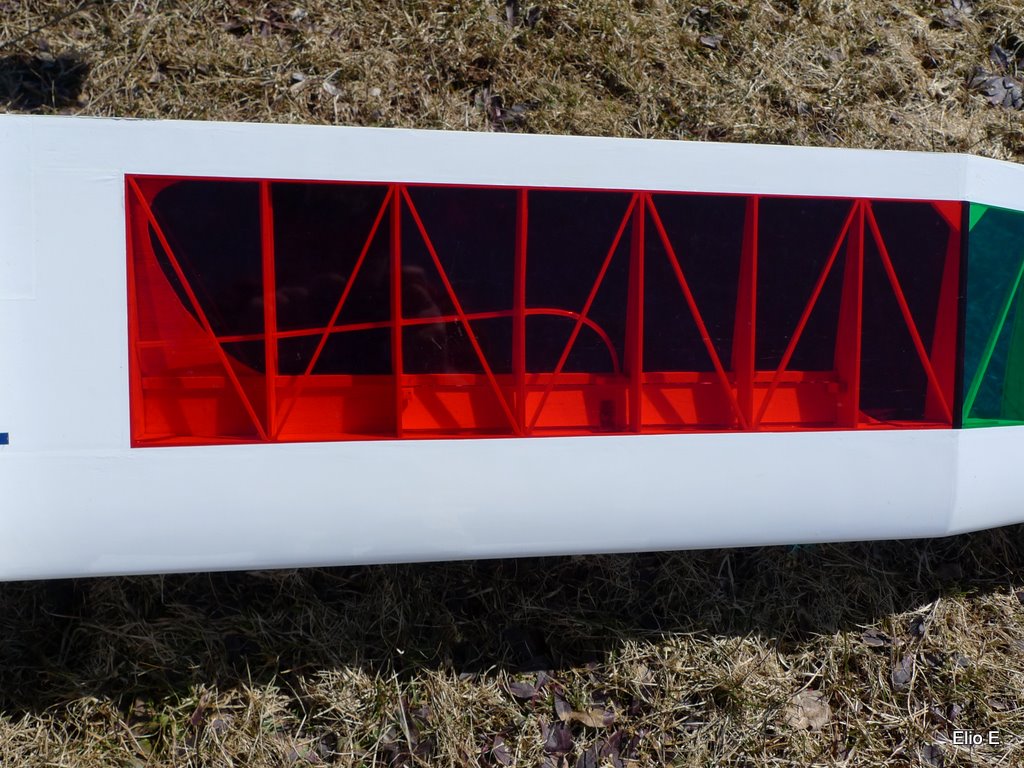
added note regarding Stab build and adding a couple more ribs between the diagonals if the TE gets to thin

Dec 2017

Flew  Elio X a lot in 2017, flying just the way I thought it would, handles the winch nicely, smooth level turns,

and will move to the next thermal when needed

Oct  2016

Updated to include info on Elio X 120 Inch Wingspan  RES, have flown it 1st flight up the line was over 15 minutes.

March 2015

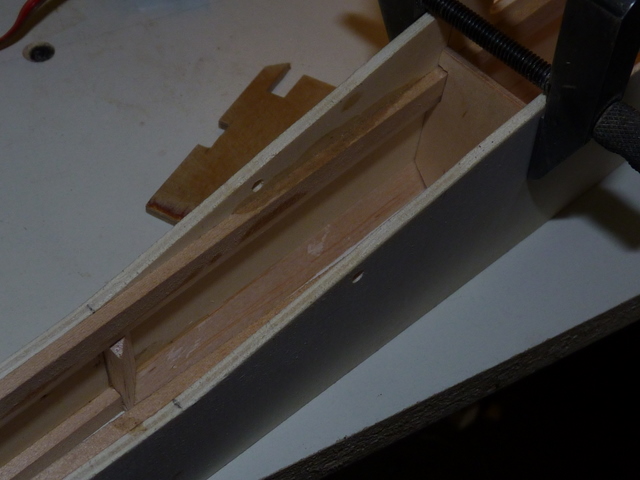
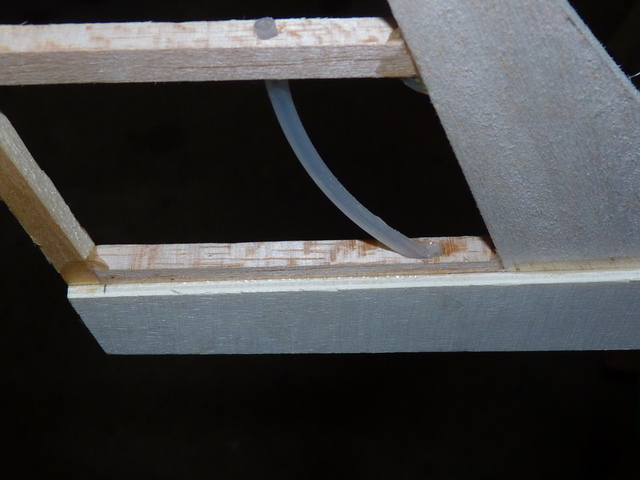
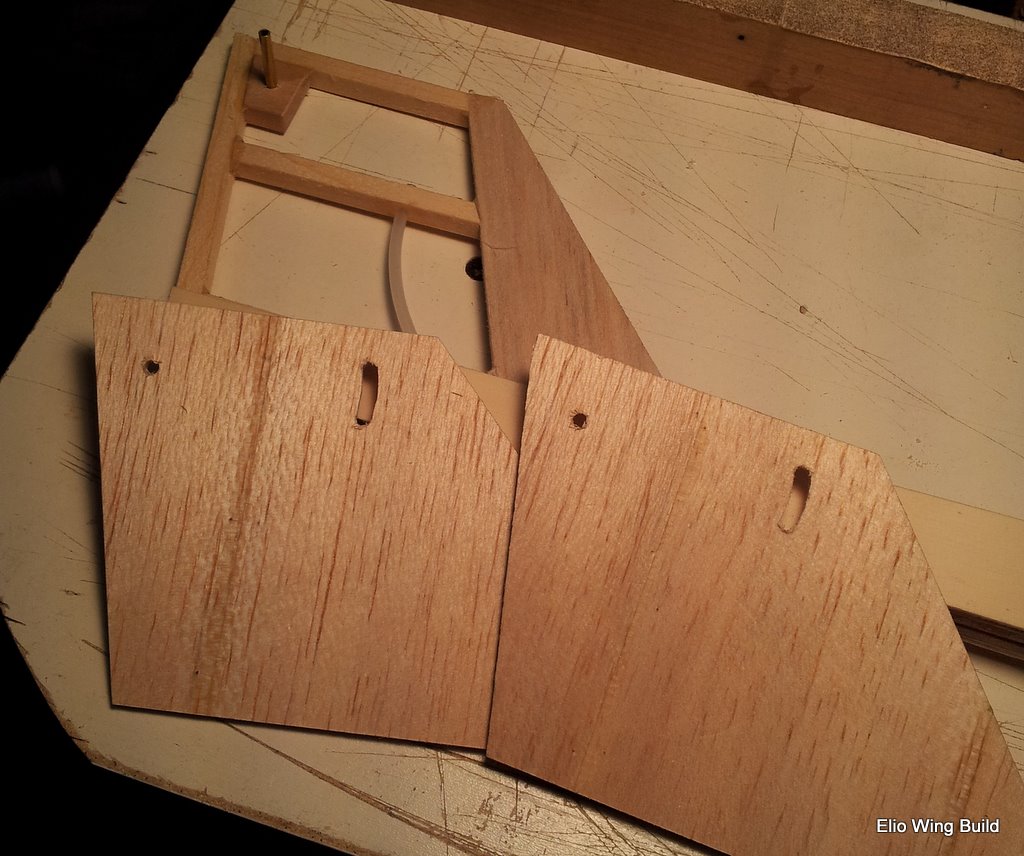
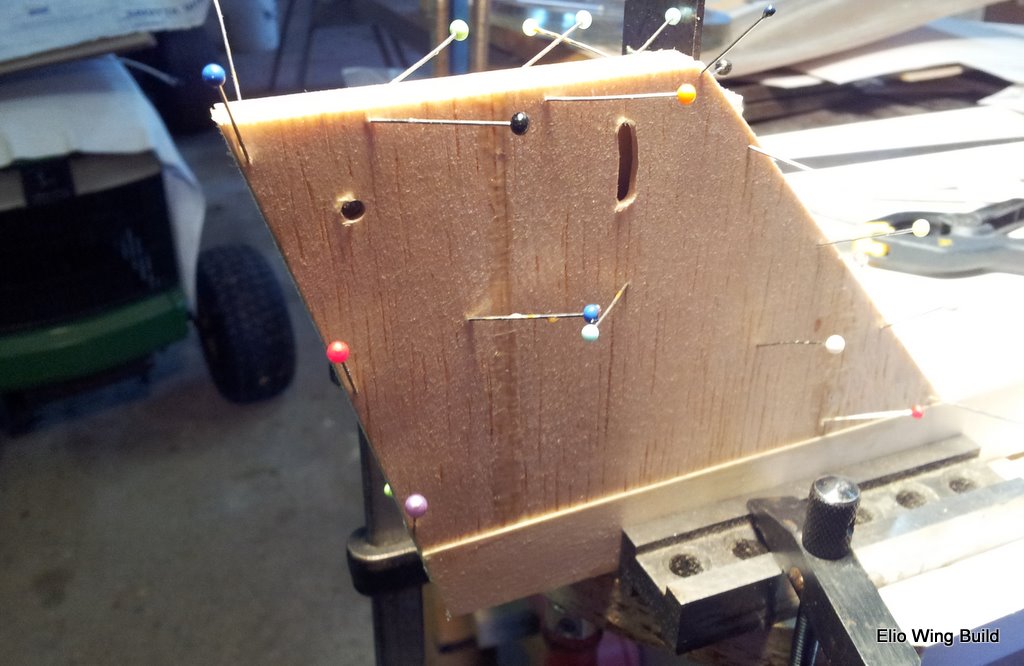
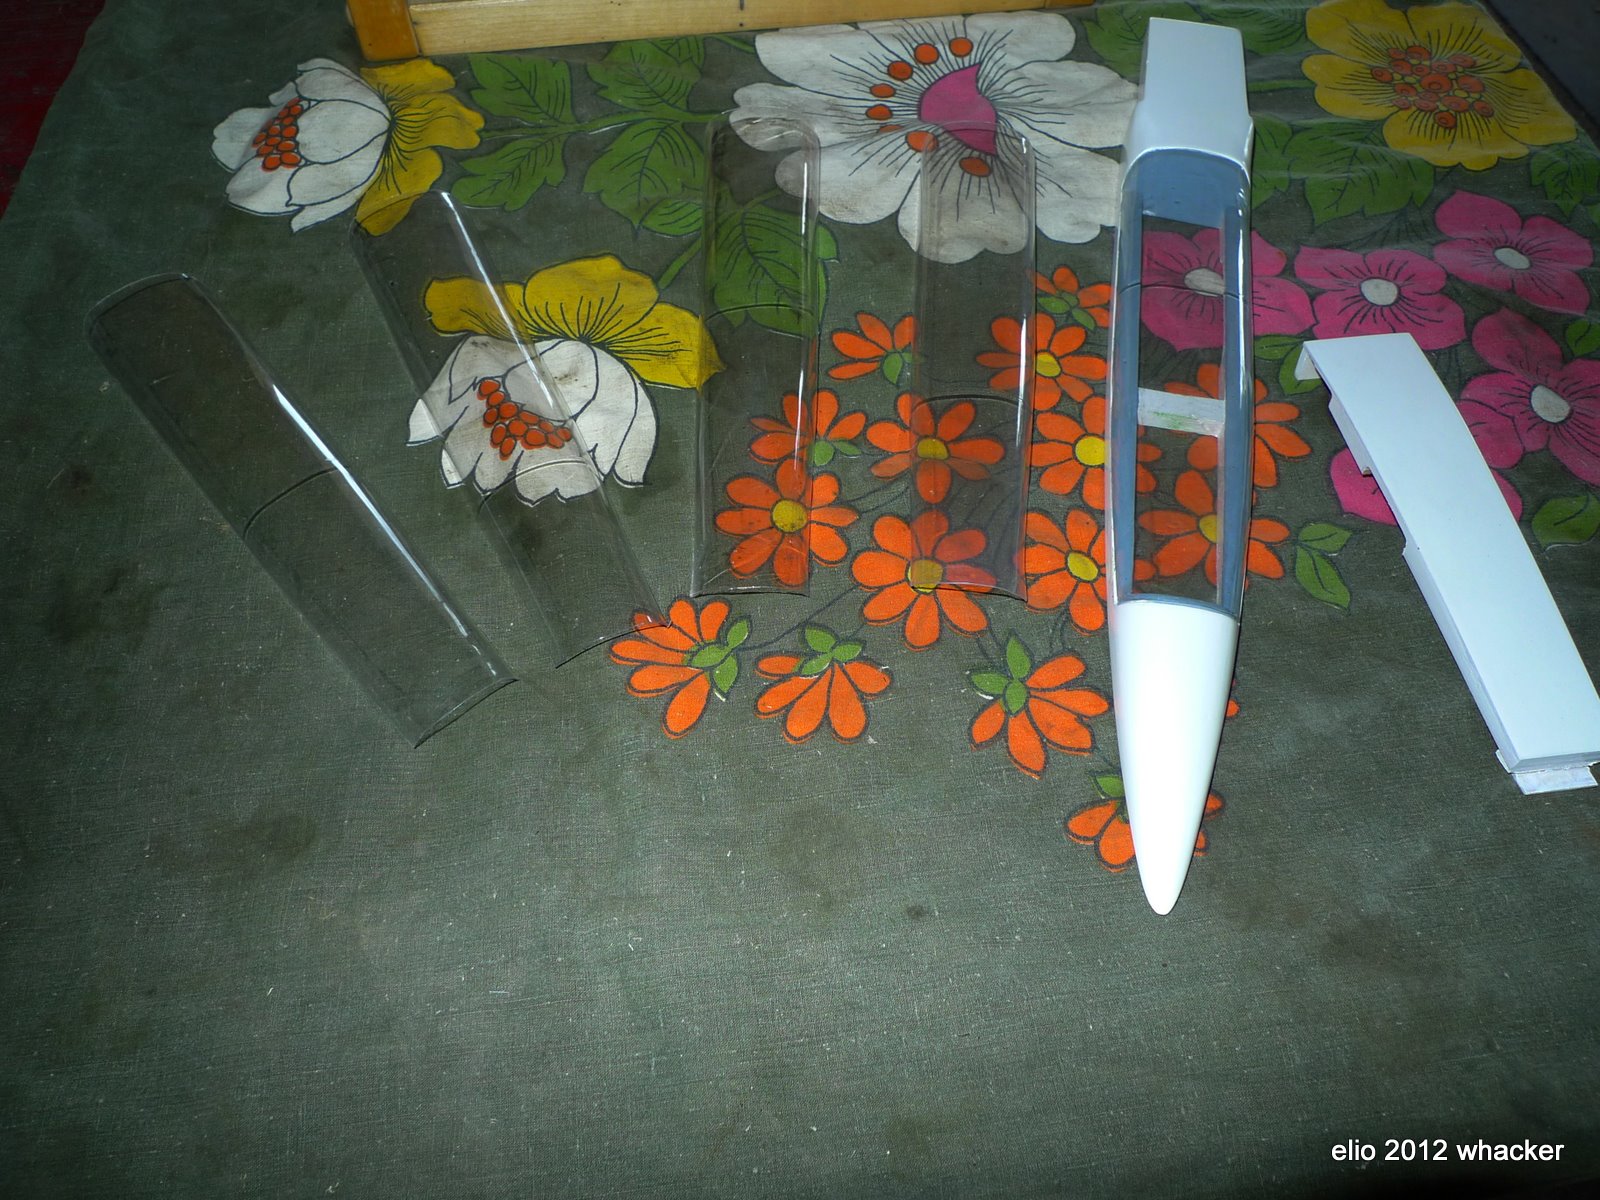
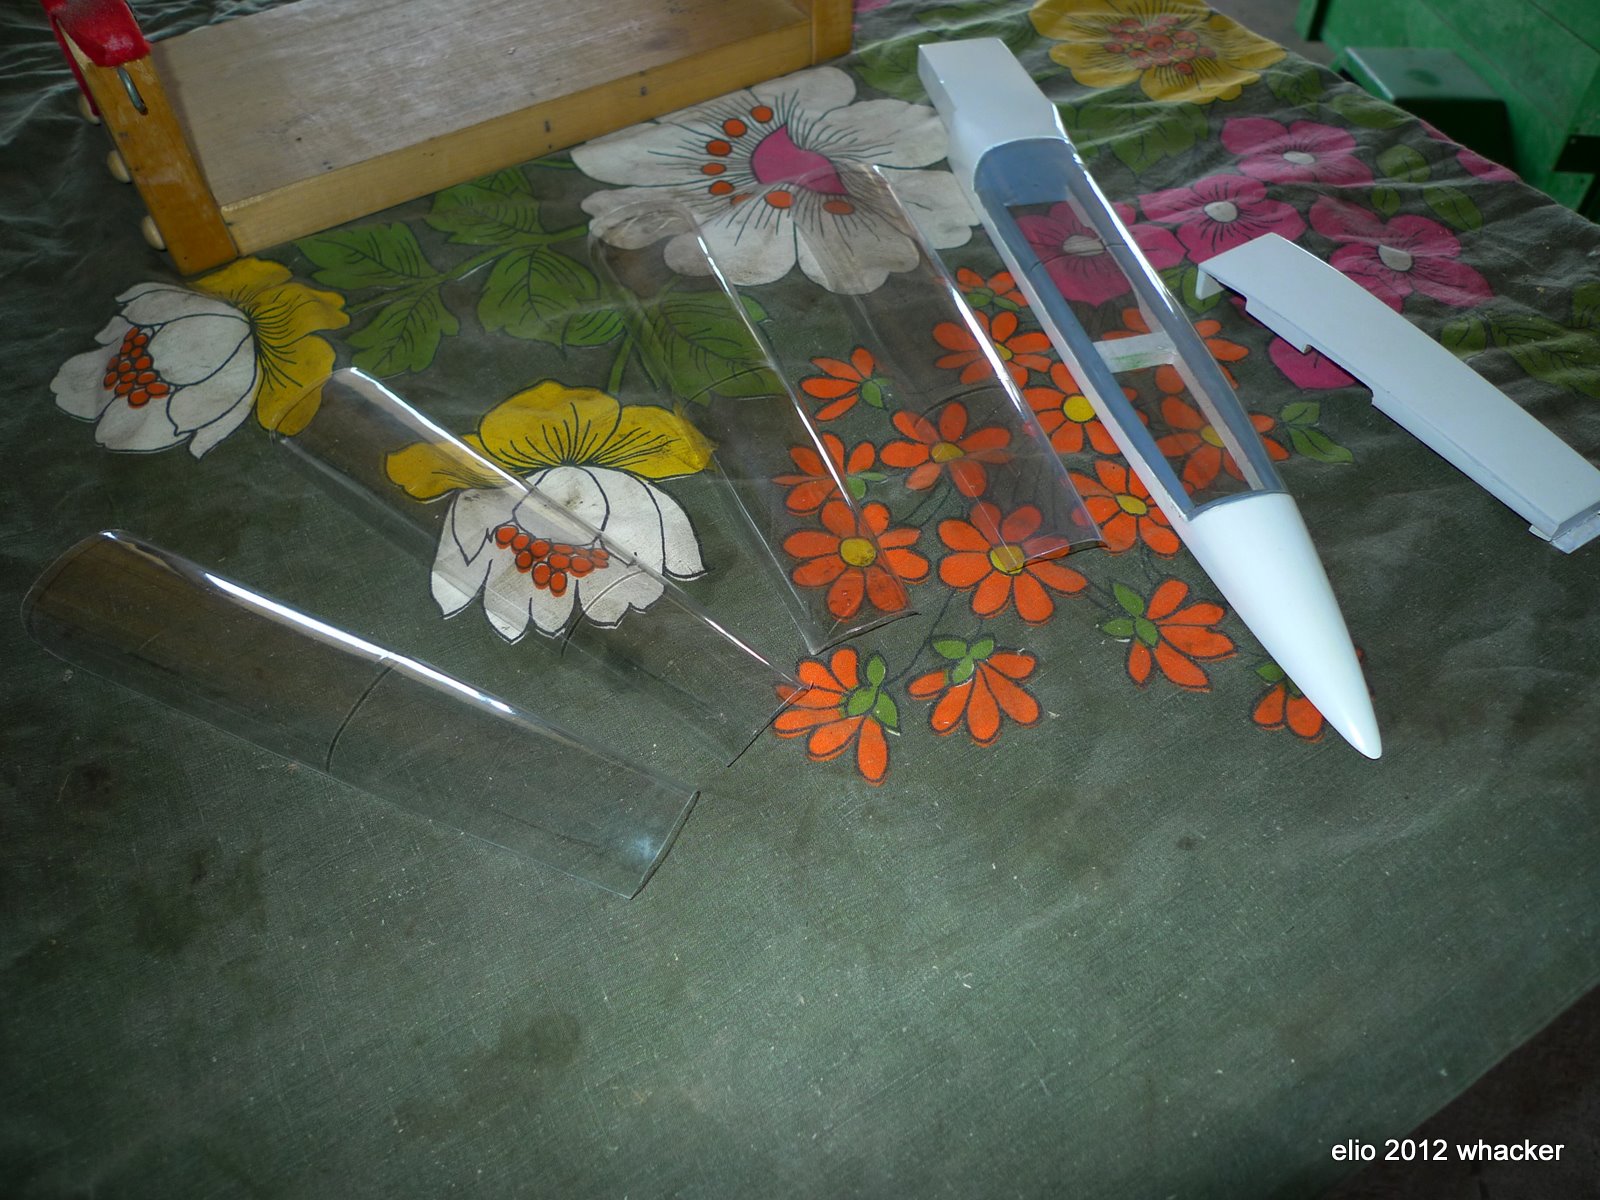
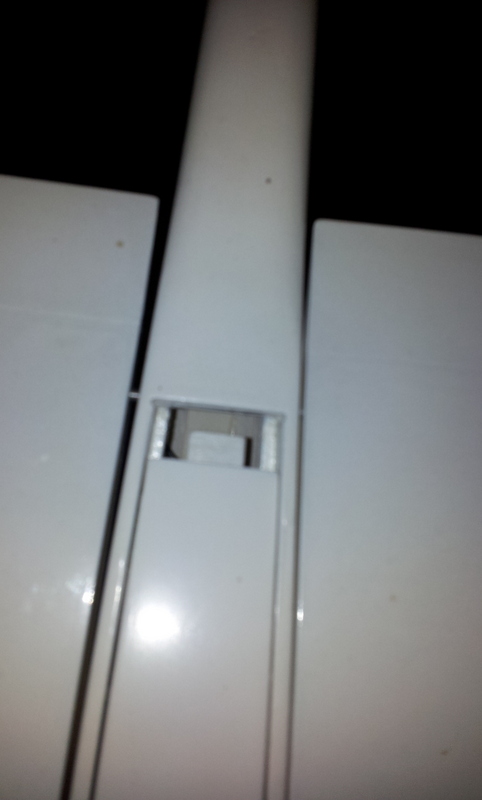
Added pics and detail  for Rear spoiler servo Hatch Cover as well as Balsa Forward Canopy

Thanks M.C.

Follow Up Sept 2013

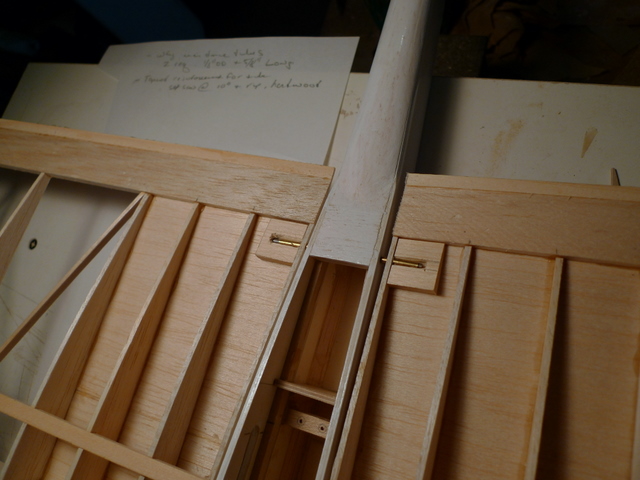
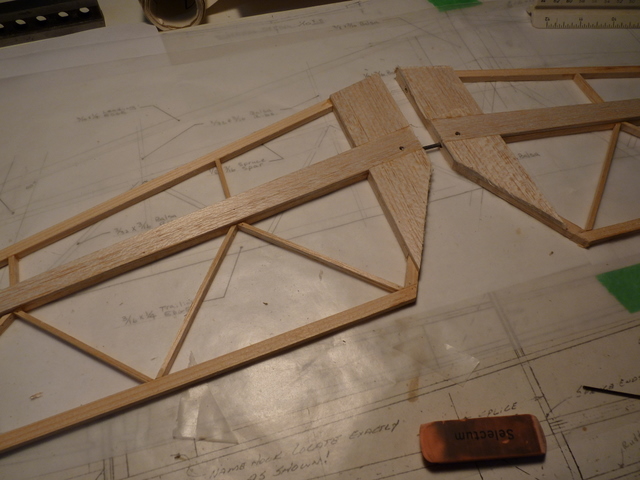
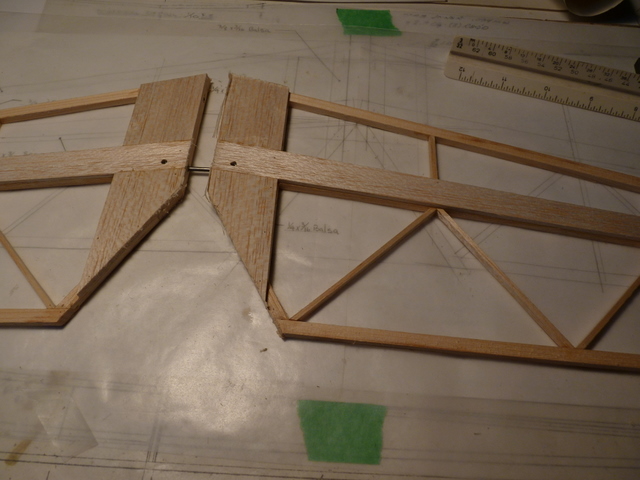
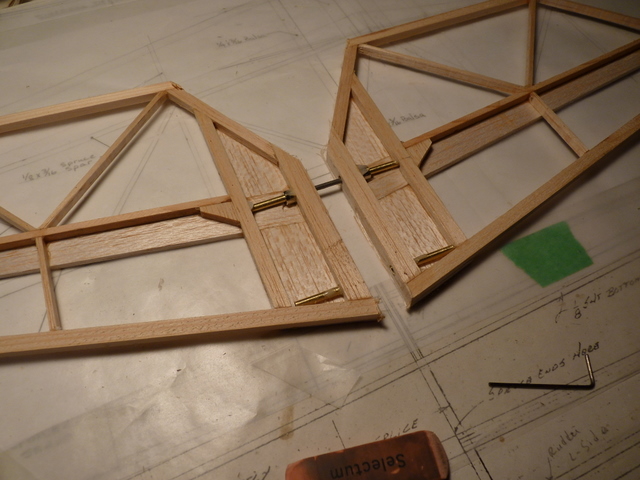
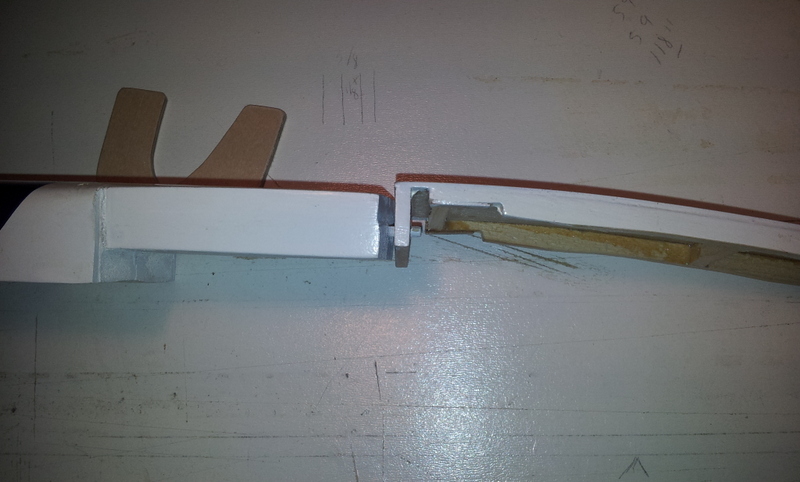
I'm updating the wings to two part, a joiner is being added at the dihedral brake making the plane more portable, and easier to ship

Note: This will be for future tests on my personal Elio  and  not part of the Elio or X Kit, inquire if Interested


July  2013 
         Elio E has logged in excess of 100 flights, most of the 5 minute range

         I have also had flights of  30 minutes from a single Launch


April  2013
  1. Elio E Maiden Flight went well
  2. steel wing rod and 700mah Nicd batterry AUW 1.425kg  (3.14 lb) Within 10 Grams of Elio Prototype Build


March  2013

  1. Wing Kits and Fuselage kits available
  2. Custom builds also If that's your need

Follow Up Feb 2013

the Prototype Elio has moved on and being campaigned at fun flies, here in the Maritimes, and soon in Ontario!

next time I get my hands on it I have a Logo for it that I would like to place on one of the wing Panels

Got my hands on it and added Logo


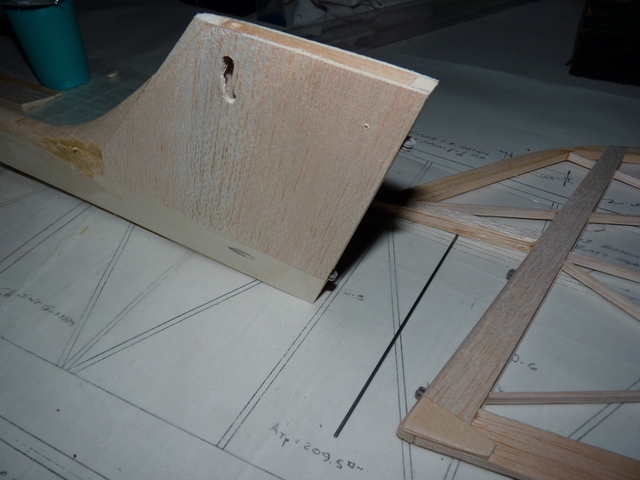
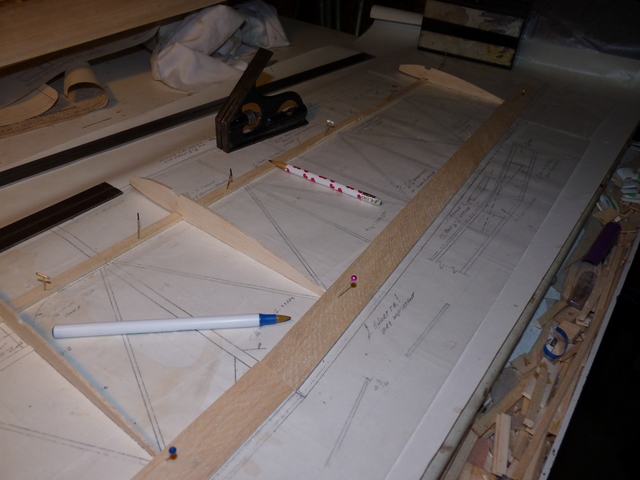
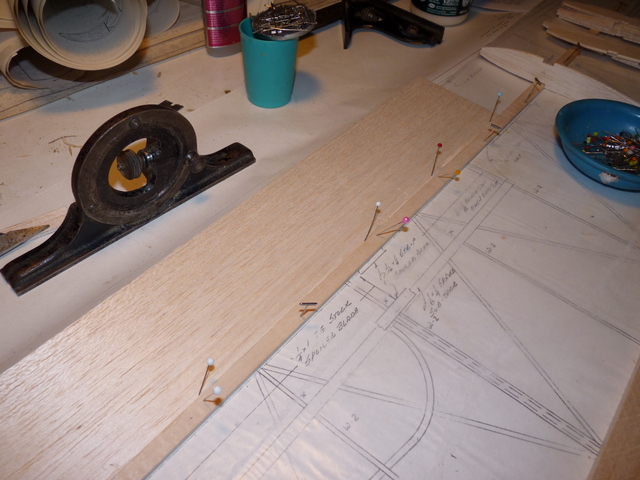
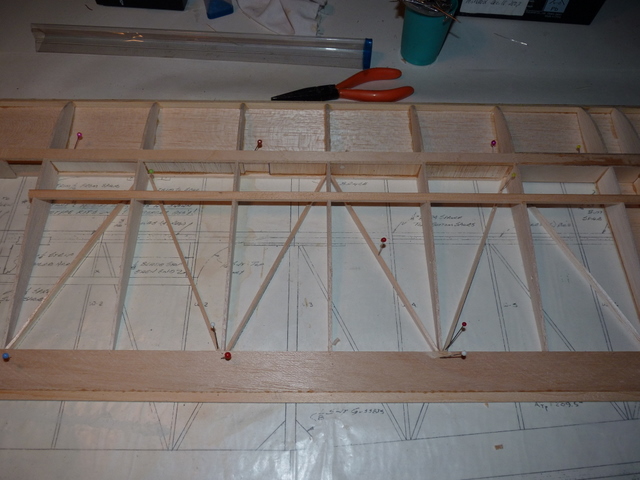
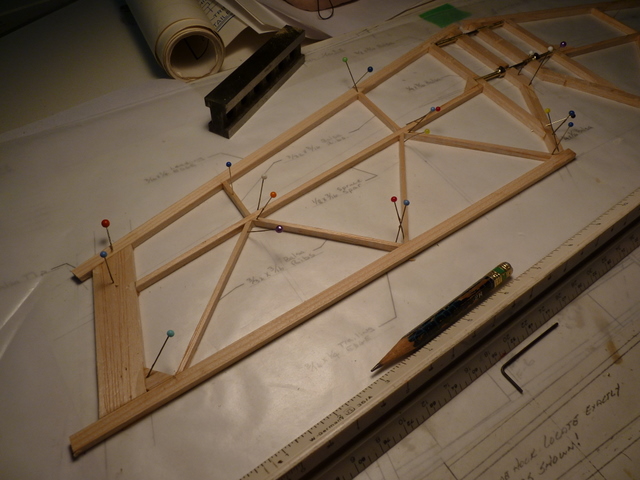
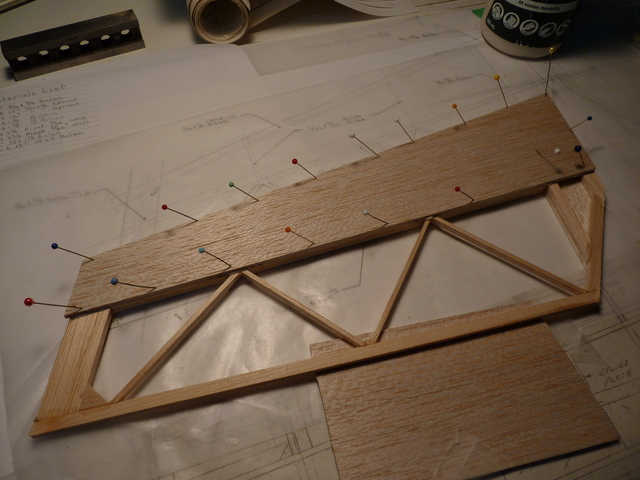
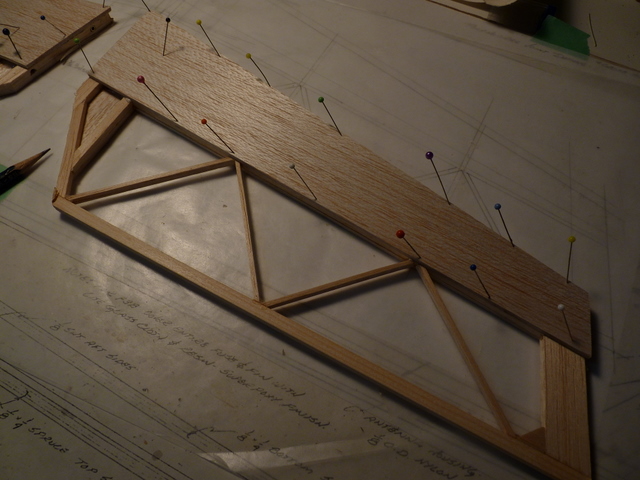
A Building board measuring 12 x 26 is all that is needed, If however you have one that is

50 inch long , then you can build both wing main panel and tip panel at the same time

Elio X requires longer board or build in stages

A piece of gyproc, on a flat bench or table is all that is needed.

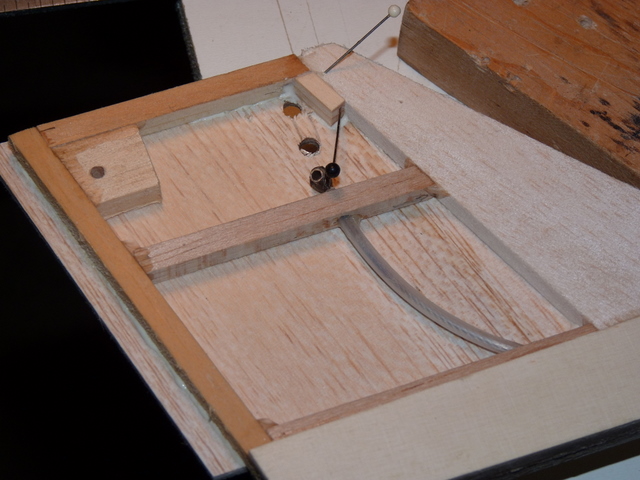
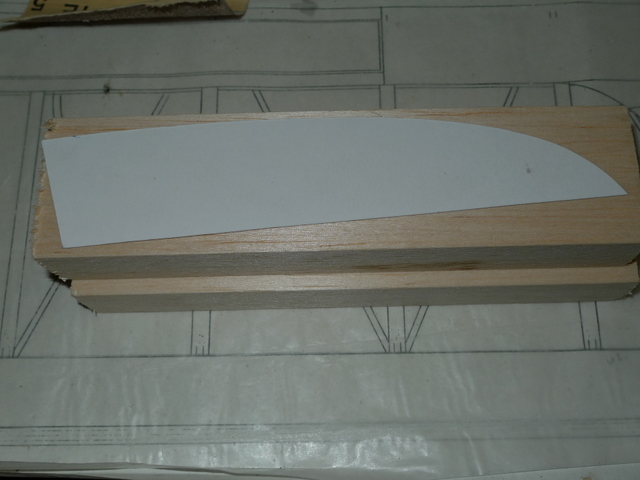
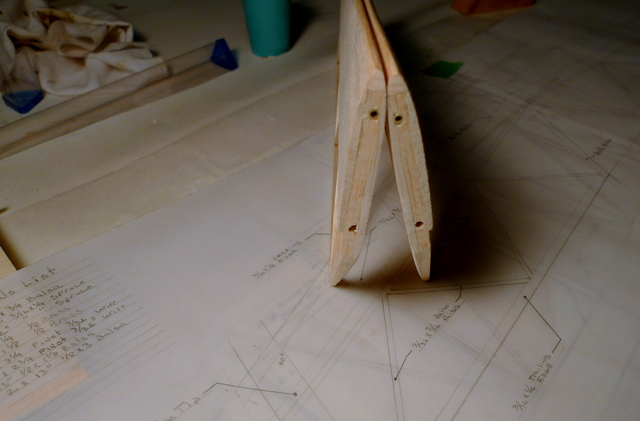
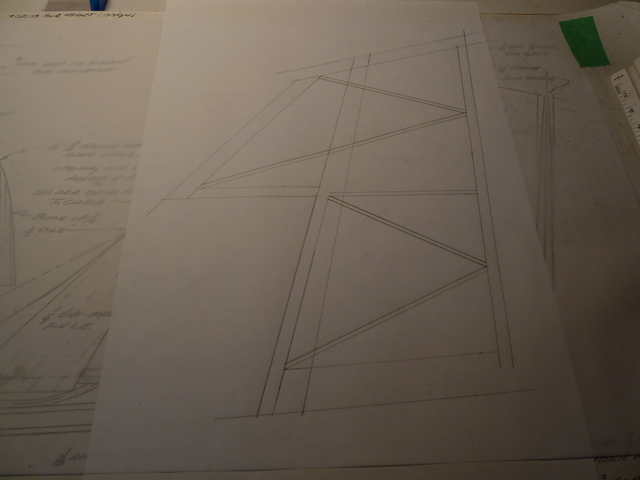
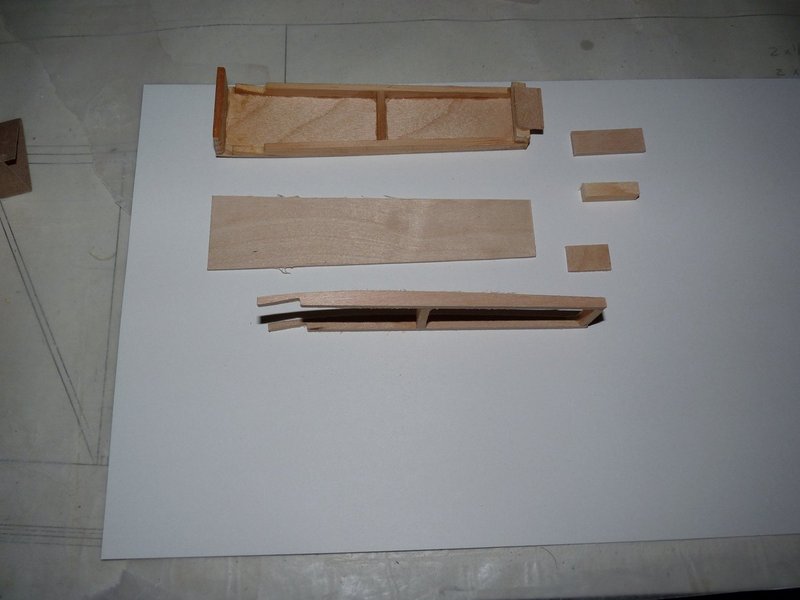
Stab set and Vertical fin are built over supplied plans, rest of plane can be built

over Sagitta 900 plans

Elio Build Below

Some details are similar to the Elio X and some improvements have been made as well to Recent Kits


Basic Kit  Elio or Elio E

Contact for Elio X

Wing Kit Includes:

  • complete rib set
  • 2 x 1/8 Brass incidence tubes
  • 2 x 11/32 Brass Wing rod tubes
  • 2 x 1/8 nylon tube for spoiler control line

Fuselage Kit Includes:

  • Built side panels, with fin, spars  and 2 Nylon Tubes
  • plywood formers F1 thru F10
  • nose block
  • plywood Forward Hatch hold down bracket
  • plywood Tow Hook reinforcement plate
  • 11/32 and 1/8 brass tubes
  • 2 pieces 1/16 SS wire for stab and rudder control
  • Formed Plastic Canopy (available by request only)

Add Option A (misc wood stock )

  • 4 leading edges
  • 4 spars
  • 4 trailing edges
  • 4 trailing edge caps


Complete Kit Elio or Elio E

Includes Basic Kit from above

PLUS

Wing Kit Includes:

  • shear webs
  • plywood spar doublers
  • tip joiners and doublers
  • rib caps
  • diagonal braces
  • balsa wing tip blocks
  • 1/16 balsa wing sheet

Fuselage Kit Includes:

  • 2 x balsa block, joiner and 2 dowels for canopy
  • 1/16 ply and frame for spoiler servo cover
  • 2 a fin side pieces
  • 3 MM tow hook
  • 1 x Steel Wing rod
  • 3 x 3/32 steel rods
  • fuselage bottom ply and balsa
  • fuselage top sheeting and filler
  • 1 x 1/8 brass stab pivot tube
  • 3/8 sheet fin fillet
  • 1/8 brass stab cable tube
  • 4 x 1/8 brass stab tubes
  • 2 x 1/8 ID collars Stab Set
  • wood for stab set
  • wood for rudder


P.S.

This write-up is a work in progress, and is not complete.....

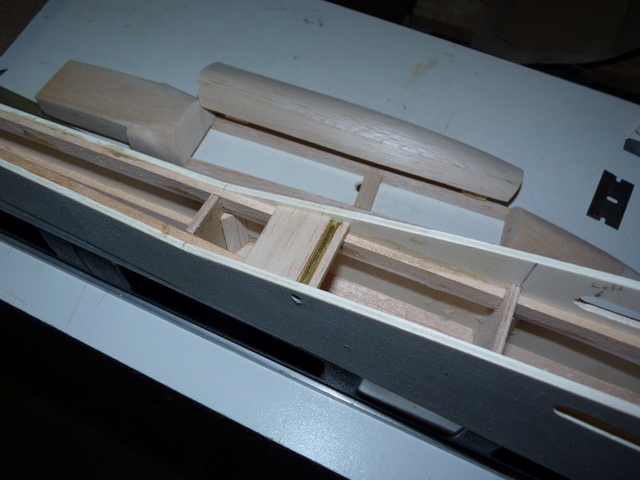
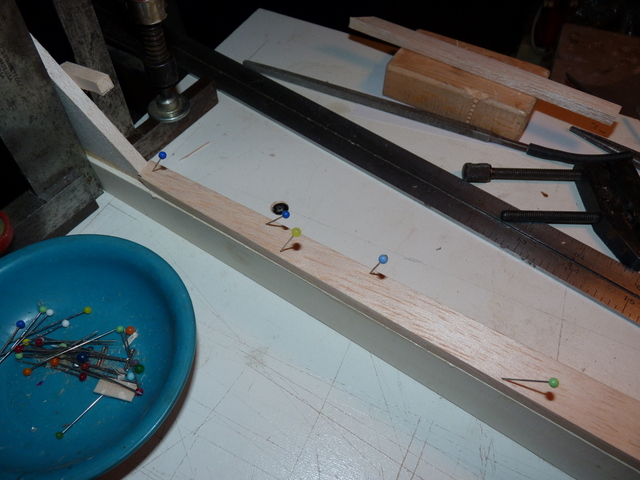
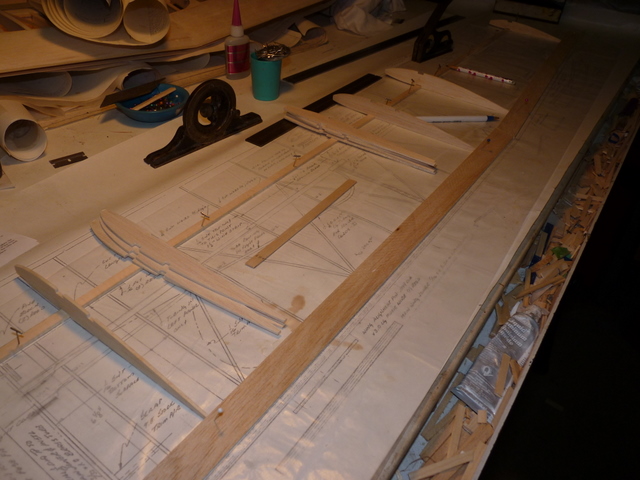
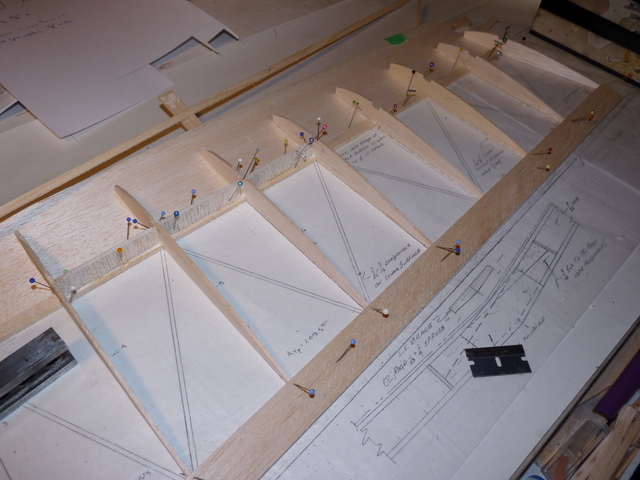
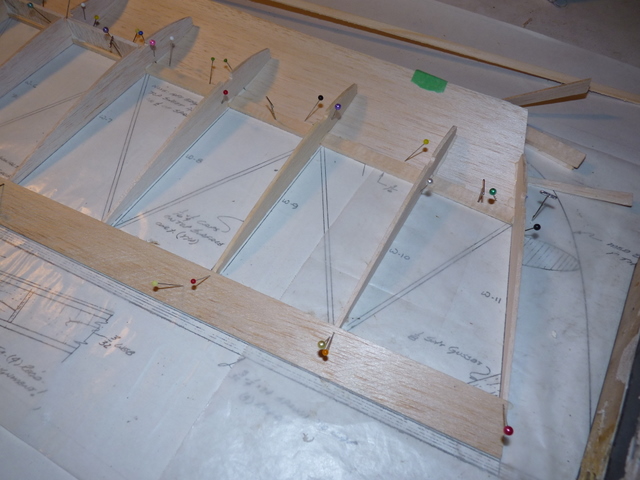
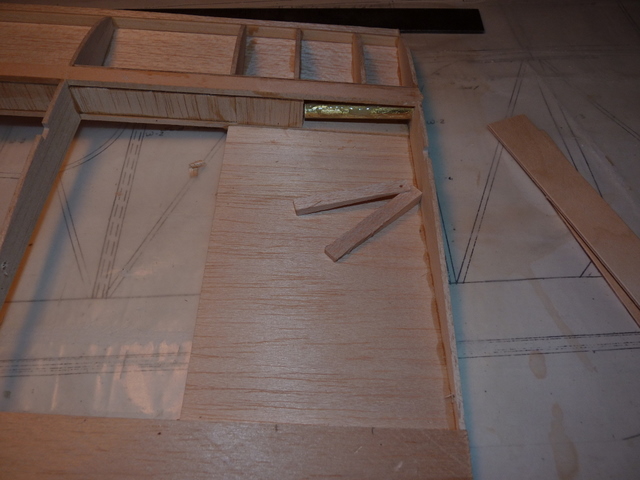
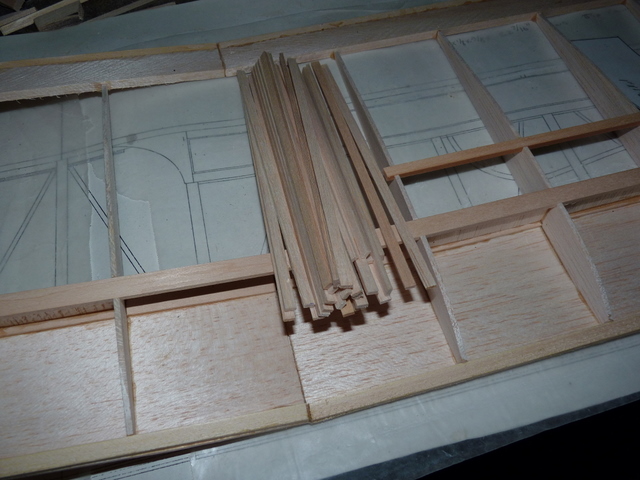
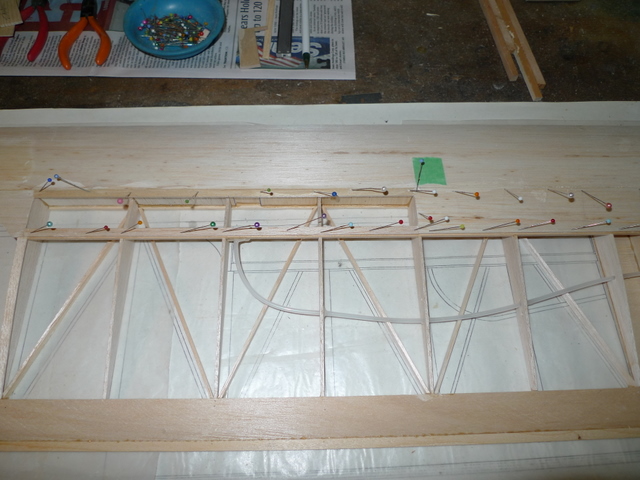
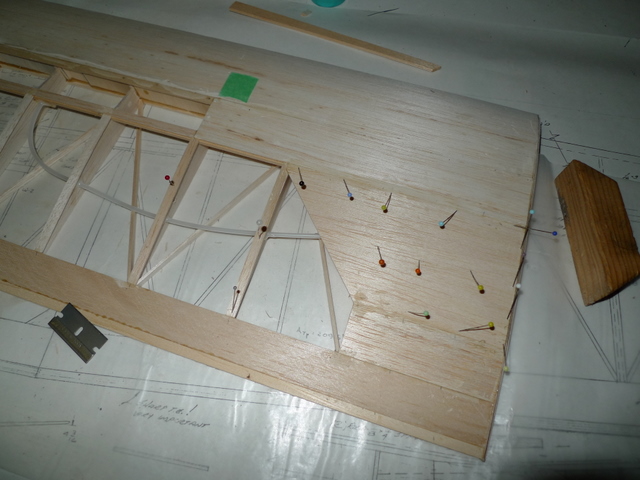
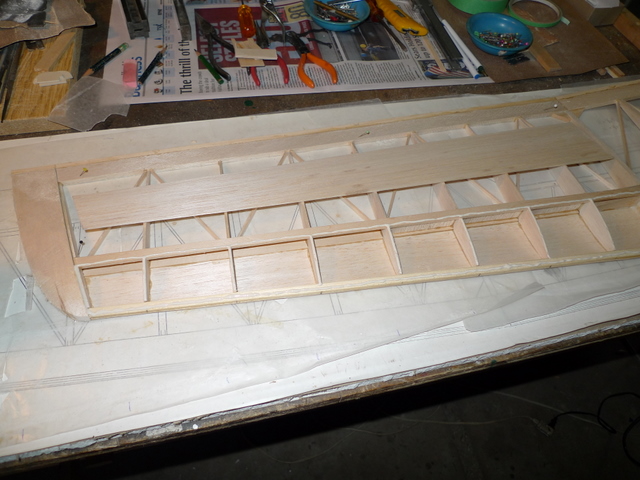
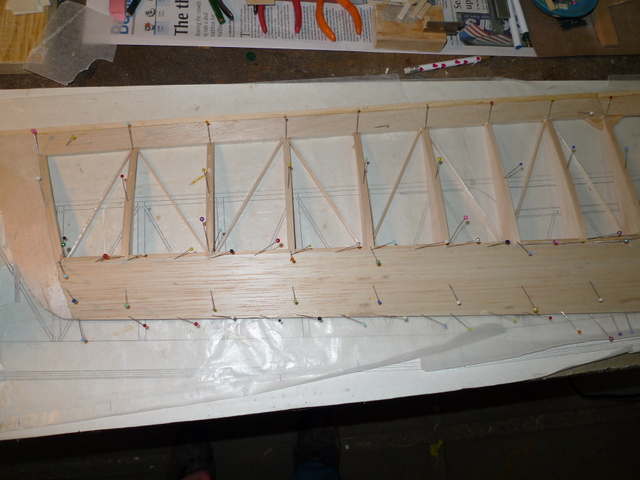
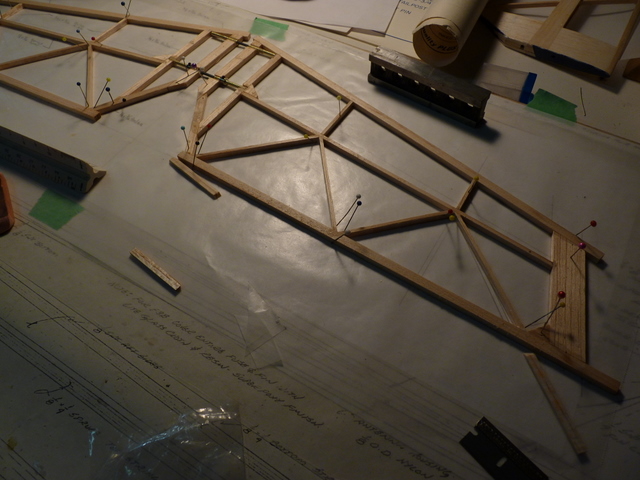
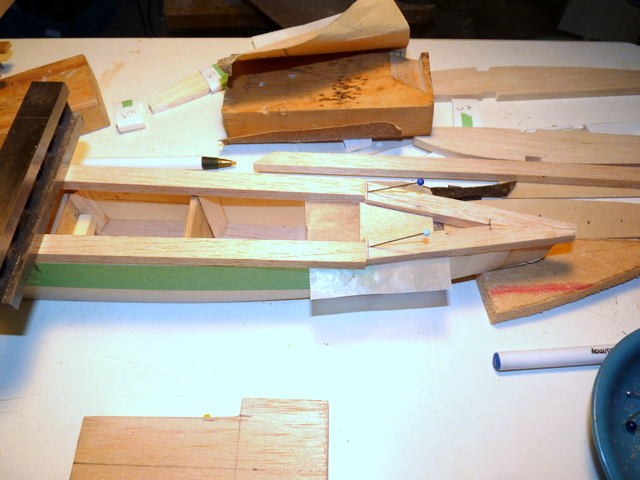
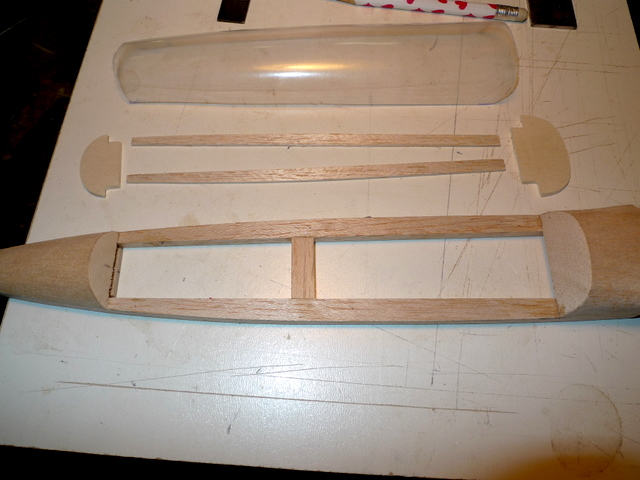
Getting  Ready to Build

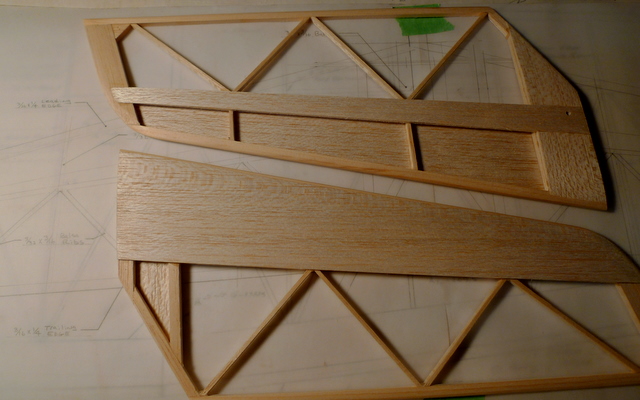
  • you'll need a building board, app 50 inch long by 12 inch wide, a board  twice this size would be better, then both wings can be worked on at the same time
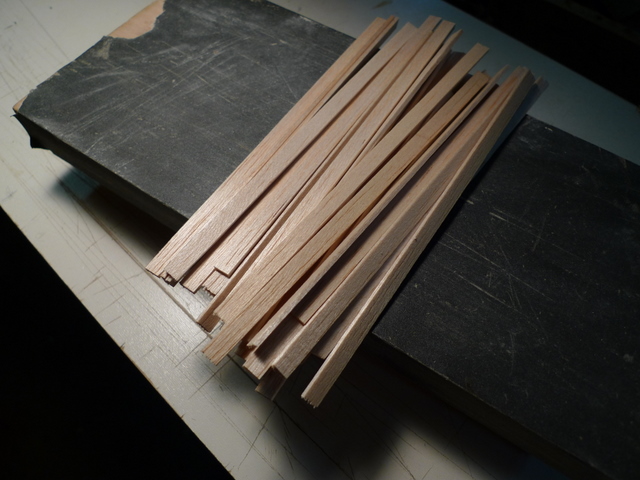
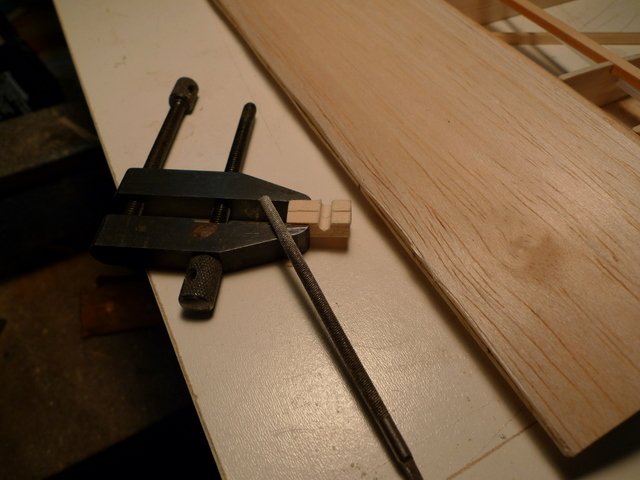
  • gather all the parts you'll need, pre cut spars and shaped pieces
  • the plane is built in six basic assemblies and as these parts all come together, you'll need to consider painting , covering and installation of Radio Gear


Fuselage Build

    • 5/16" Dia steel wing rod x 6" Long, Complete Kit may ship with CF Rod
    •  pins for stab, Steel 1 of 3/32 x 3 1/4 and 1 of 3/32 x 2 3/4
    • 1 req wing incidence pin Steel 3/32 x 2 3/4
    • 1 req brass wing rod tube 1 5/8" long x 11/32" O.D in fuselage
    • 1 req 1 5/16" long x 1/8 O.D. brass incidence pin tube in fuselage
    • 1 req. 1/8 O.D.x 5/8 brass tube for stab pivot
    • 3 x nylon tube, rudder, stab, and antenna(included in built up fuse sides)
    • 2 x 1/16 cable, rudder and stab

gluing in the nose block, I use 30 minute epoxy, bring up to the lines on the fuse insides, and flush with the top edges..

Note the down side of the block

fuselage rear top balsa , being glued on 1/4 balsa sheet  x 3/8 wide at rear and 1 1/16 inch at front

17 1/2 long

Set fuselage on board , and use a square to hold fin perpendicular to board before gluing

1/8 plywood, 1/2 wide x  3 3/4 long for tow hook stiffener plate..

Fashion a 1 inch long slot down the middle to accommodate a 4-40 (or suitable) tee-nut for the hook..

this gets epoxied in place between formers F5 and F6,  flush with rear of F6

Wing Build

  • cut 4 spars 1/8 x 3/8 spruce, 23 13/16 " for inboard panels

  • cut 4 spars 1/8 x 3/8 spruce, 22 7/16 " for outboard panels

  • 4 sheets 1/16" x 3 x 24 for lower leading edge sheeting
  • 4 sheets 1/16" x 3 x 24 for upper leading edge sheeting
  • cut 2 sub spars 1/8x 1/4 spruce,  21 1/4"
  • brass tubes 2 of 1/8 O.D. x 5/8 for incidence pin 
  • leading edges, custom shape  4 Req.  24" long, cut and trim to fit
  • spruce trailing edge cap 2 of  3/32 x 1/4 x  24 for inboard panel
  • spruce trailing edge cap 2 of  3/32 x 1/4 x  26 for outboard panel
    • balsa trailing edge 4 of  1/4 x 1 Aileron Stock  x 24 long
    • brass wing rod tubes 2 req.  2 1/4 inch long, 11/32 O.D.
    • brass wing incidence pin tubes 2 req 1/8" O.D. x 5/8" long


Notes in case you want longer wings

-- add 1 rib to each inboard panel, for each additional 6 inch increase in wingspan

for a 118 Inch wing, add 3 ribs to each inner wing panel.

That will give a 18 inch stretch  to the Standard 100 inch wing.

Consideration needs to be made as well for the stab and rudder size


pin the bottom spars, both main panel and tip,  in location, a 4 foot level will help keep it straight on the plans. A good start here makes for a straight wing later

remember to place some wax paper over your plans to protect the plans from Glue


locate the trailing edges using the ribs

trim outboard panel trailing edge to appropriate angles on ends


select the 1/4 x 1 trailing edge pieces, and trim the ends to the appropriate angles and pin to building board in position, using ribs as place holders


glue a sheet of 1/16 x 3 x 24 to the front edge of the spar for the bottom leading edge sheeting.

Note : Cut the end of the sheet at the root rib to the required angle, and it will help in placing the balsa root rib later

Also, cut and fit and glue the bottom edge sheeting for the outboard wing panel.

Fit all sheets, tight to lower spar and flat to building surface.


glue the 1/16 sheeting into the center aft position, between the spar, behind it and the 1/4 x 1 trailing edge


using the pre cut shear webs 3/8, 1/4 and 3/16"  as spacers, place and glue the ribs in place


balsa root rib being glued in, us a dihedral jig to set at proper angle 3 Deg beyond 90


formed leading edge being glued to front of ribs, I like to place and glue this in after the root balsa rib is placed.

Support under the lower leading edge sheeting in helpful at this step


Gluing the front spar ply webbing with 30 minute epoxy


placing shear webs on outboard panel, cut in pairs and glue in same spot of both outboard wing panels


Gluing the 3/4 x 3/4 1/8 ply eyelet reinforcing plate at the root rib


adding the ply root rib to the right wing panel, left wing panel follows.

Secure panel down tight to building board, watch location of holes for spoileron actuator tubes, as one is behind the other.


joining the inner and outer wing panels, a 4 ft level works great to jig both panels prior to gluing the 1/16 plywood brace


Diagonal braces cut and ready to be glued in

30 pieces, cut from 3/32 balsa , 3/16 wide x 7 inch long

trim to fit prior to gluing


glue in wing joiner cross tie braces, 2 per wing
-3/16 x 1 1/2 x 12 Balsa will make 4 pieces , as required


3/32 x 3/16 diagonal braces, diagonals can be cut nicely with a single edge blade

wing end caps


Stabilator Build


  • E1 3/16 x 3/4 Balsa Tips 2 x 4"
  • E2   3/16 x 1/4 spruce  trailing edge 2 x 12"
  • E3   1/4 x 3/16 Balsa  2 x 4"
  • E4   3/8 x 3/16 Balsa 2 x 3 1/2"
  • E5   1/4 x 3/16 Balsa 2 x 5"
  • E6   1/8 x 3/16 Spruce Spar  2 x 12"
  • E7   3/16 x 1/4 Spruce leading edge 2 x 13"
  • E8   1/8 x 1 1/8 x 13 inch Balsa Spar Caps  cut to shape ,  one end 3/4"wide
  • E9   1/8 x 3 Balsa  bottom Leading Edge Sheet,   cut from 1/8 x 3 x 24
  • E10   1/8 x 3 x 2 1/2  2 pc 1 1/2 wide, filler inboard end top LE
  • E11   1/8 O.D.x 1 1/4 brass tube Rear 2 pc
  • E12   1/8 O.D.x 1 1/8  brass tube Forward 2 pc
  • E13   3/32 x 3 1/4 steel pin rear
  • E14   3/32 x 2 3/4 steel pin front

Misc

2 x  1/4 OD x 1/8 ID  Collars with set screw
Misc 3/16 balsa for gussets

3/32 x 3/16 Balsa app.  40" for ribs

NOTE:  Consider a couple extra Ribs between the spar , the TE from the intersection of the diagonal ribs back to the TE


- Cut and pin down balsa and spruce to suit.

- Maintain 2 inch front to rear spacing for brass tubes, this is critical to suit fin on fuselage later

If fin is built verify with fin measurement

- when placing collars over rear most brass tube, be certain that grub screw holes both point up

- reinforce connection at inboard end of spruce spar with 3/16 balsa gusset

- remove stabs from board to glue lower full LE sheet as well as upper spar caps and filler sheet

- use epoxy at all brass to balsa glue joints. Clean brass and roughen with coarse sandpaper

Sand to shape too a nice airfoil, note thickness on the edges is maintained at the thickest at app

3/16" which is that of the balsa and then rounded from that point


Rudder Build

R1     1/4 x 3/16 Balsa  4"

R2    1/4 x 3/16 Balsa  6"

R3    3/4 x 3/16 Balsa  5"

   R4    1/4 x 3/16 Spruce  10"

R5  5"  1/4 x 3/16 Spruce  5"

R6  6"  3/4 x 3/16 Spruce  6"

                             R7     3/32 x 3/4 Balsa Tapered at Top 2 x 9"

   R8    1/4 x 3/32 Balsa  2 x 4"

              R9   2 of 1 x 1  1/16 PLY (cut to suit)

R10   3/32 x 3/16  24" ribs


Canopy Frame Build (Elio only)

Elio E has Balsa Forward Hatch, Elio can also be built with Balsa Forward hatch (Canopy) builders choice.

Balsa Canopy is actually an easier build .


canopy frame assembly front portion


cowel frame assembly front portion


Rear hatch, held at rear with a tab that sets on the underside of the incidence tube and at the front edge with a pin that passes thru a hole in the center of the forward flange frame.

Hatch frame side rails are sanded at a curve on the top to match fuselage top edge. Notches are added to suit a fit of maple tube carrier in the fuselage.

For Balsa Canopy Option, a little more detail is shown in above picture. Canopy can be carved out of 1 piece of balsa or two pieces and then held together with a 1/8 " plywood spline between the two pieces, Canopy underside can be hollowed out If necessary, to reduce weight or provide clearance to rudder and stab servos and linkages.

Underside of Canopy and rear hatch showing pin  thr hole which also engages a hole in the center of the hardwood tube carrier ober the wing rod tube in the fuselage

                                                                                                             update May 2019                 Elio December 2011


>